What will I cover in this post?
We will learn how to integrate Keycloak with Okta SAML Provider.
Do not forget to follow me on Twitter

Configuration
Keycloak and Okta need to be configured in parallel.
First, you need to add the SAML identity provider in Keycloak.
Then you to add a SAML application in Okta using the Keycloak Redirect URI value.
Finally, you need to import the Okta SAML application metadata into the Keycloak Identity Provider.
Add SAML identity provider in Keycloak
Open Keycloak admin page, click Identity Providers and select SAML v2.0 provider from the list of providers.
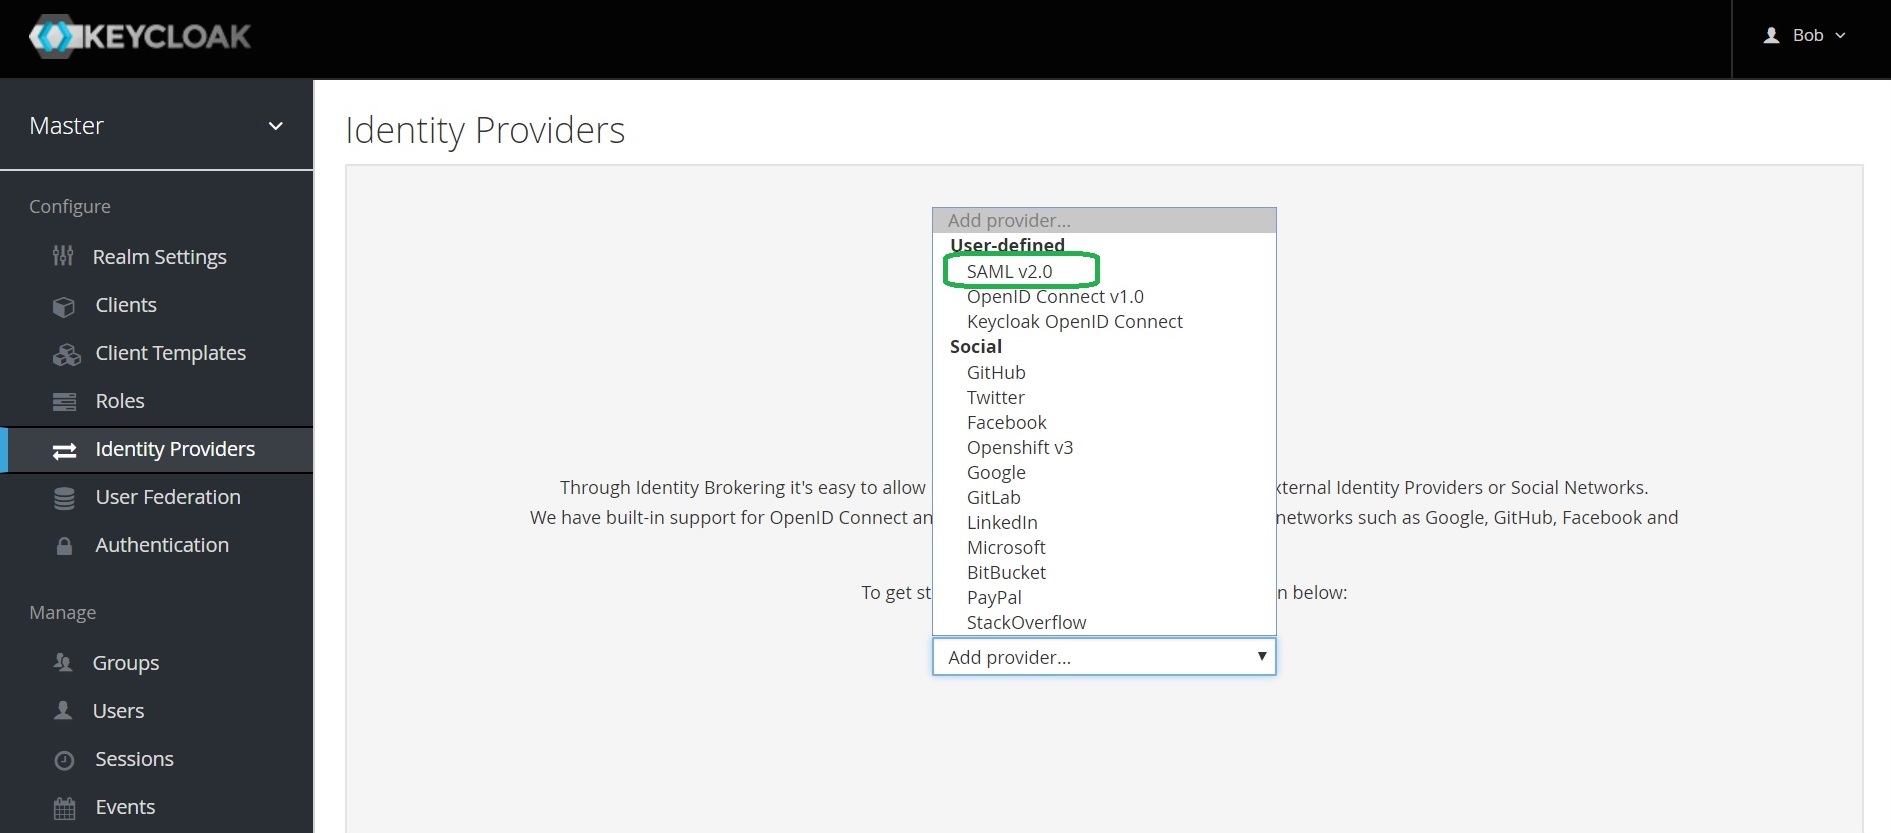
Keycloak SAML Identity Providers documentation is here
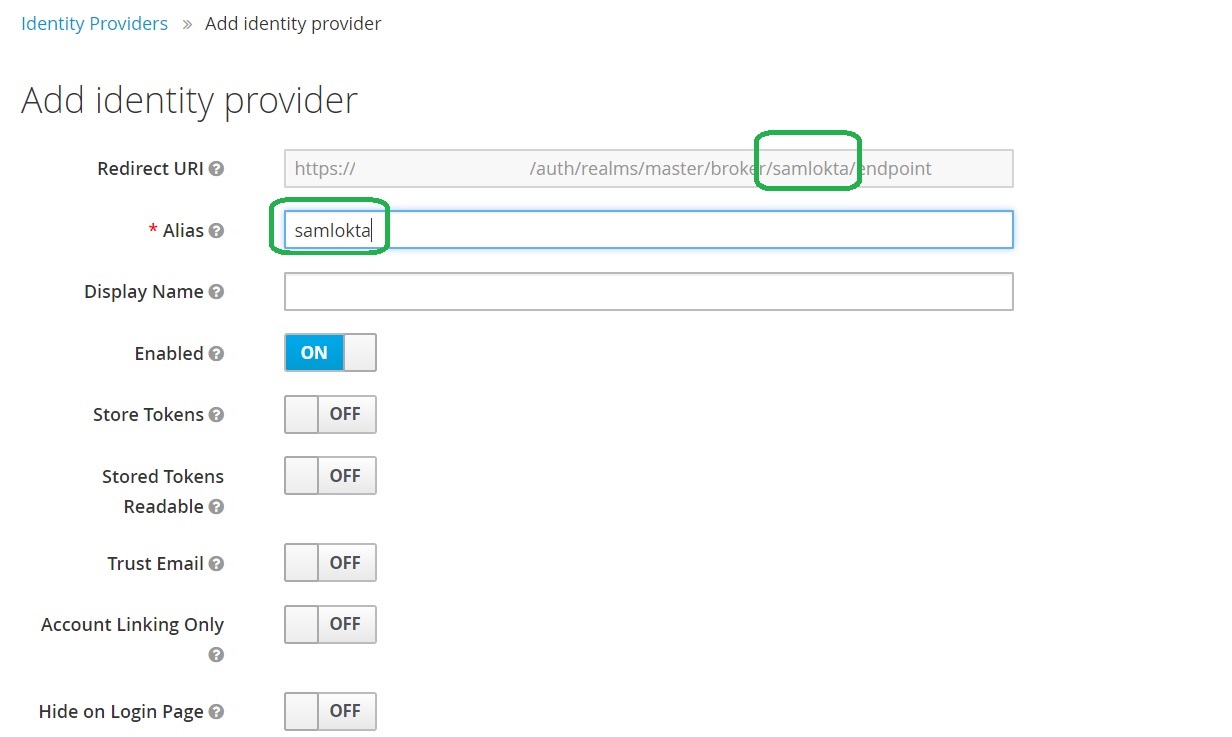
Configure SAML provider in Keycloak
Enter the Alias. Notice that it is part of Redirect URI
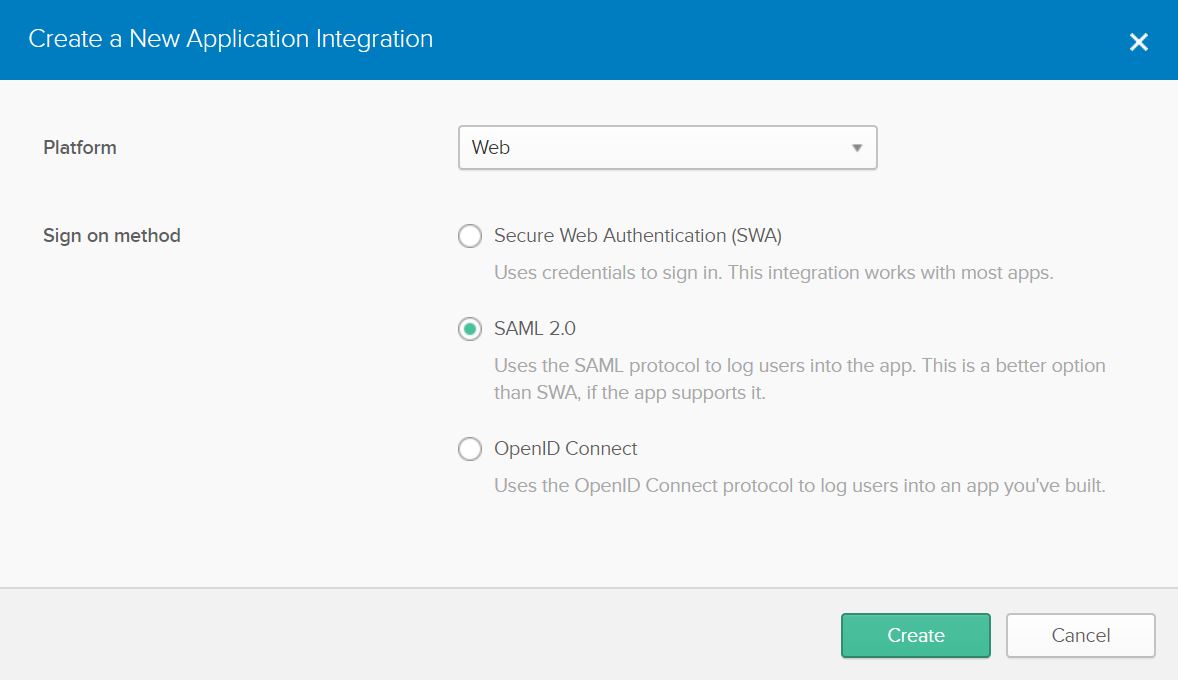
Add SAML application in Okta
Select “SAML 2.0” and click Create.
Provide the application name
Enter the application name and click Next

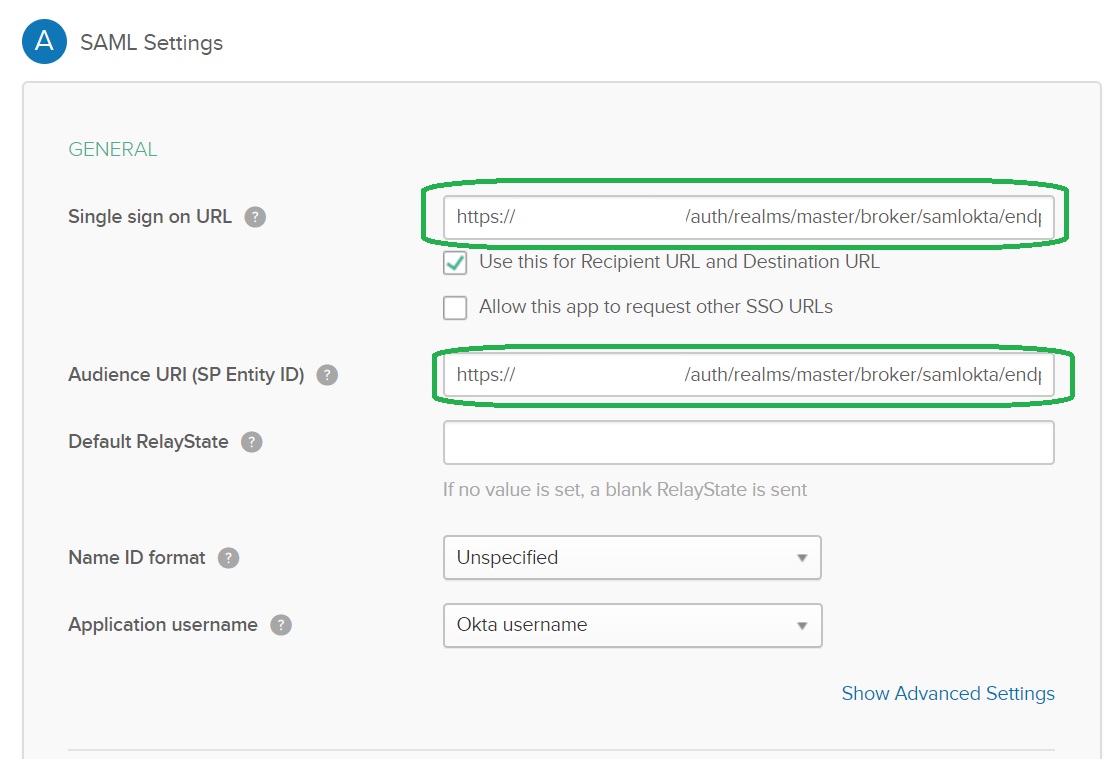
Configure SAML Settings
Configure SAML Settings by copying the Keycloak’s Redirect URI from the SAML v2.0 provider page of Keycloak to Single sign on URL and Audience URI (SP Entity ID) settings. Click Next.
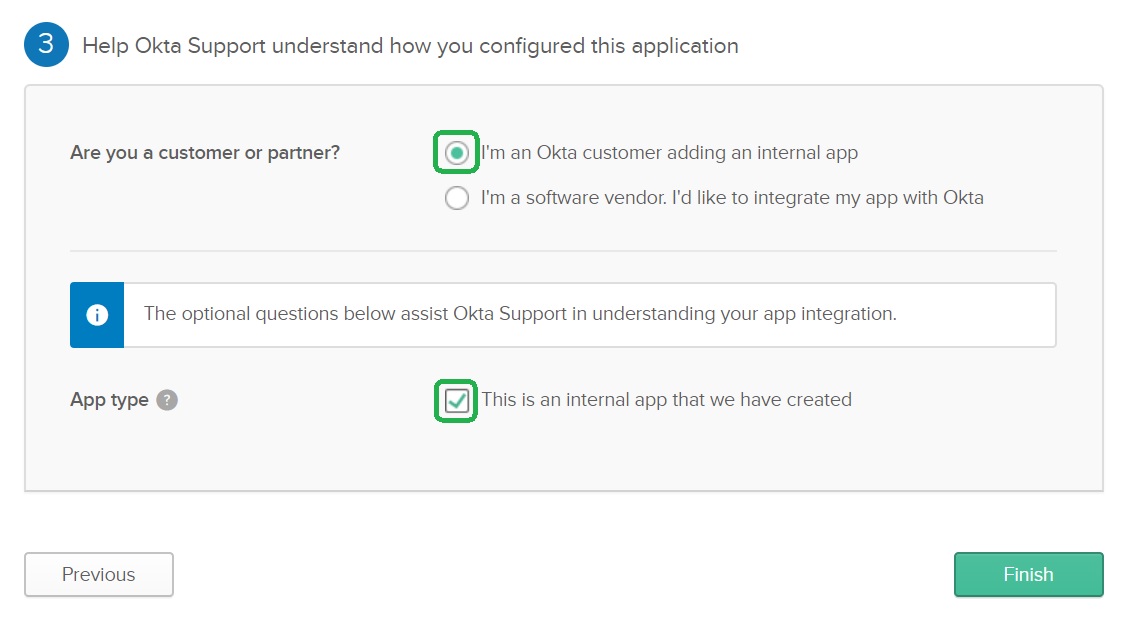
Configure the application type
Configure the application type by completing the fields as indicated below. Click Finish
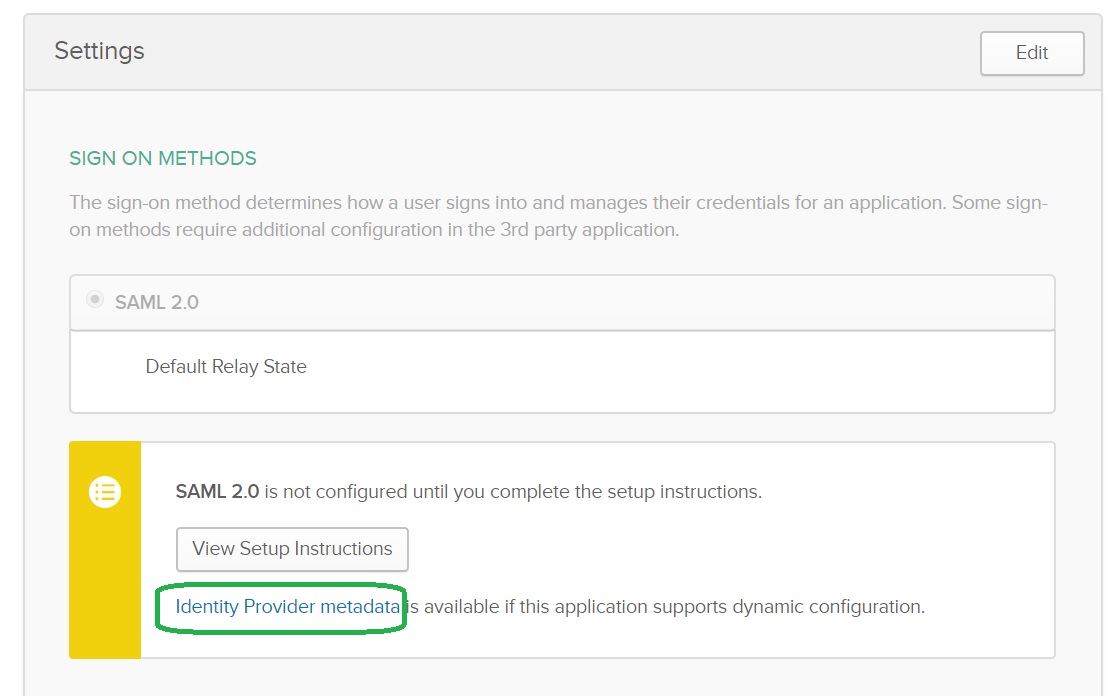
Copy the metadata link
From the menu, click Sign On configuration for the application you are working on. Hover over Identity Provider metadata link, right-click and select from the menu Copy link.
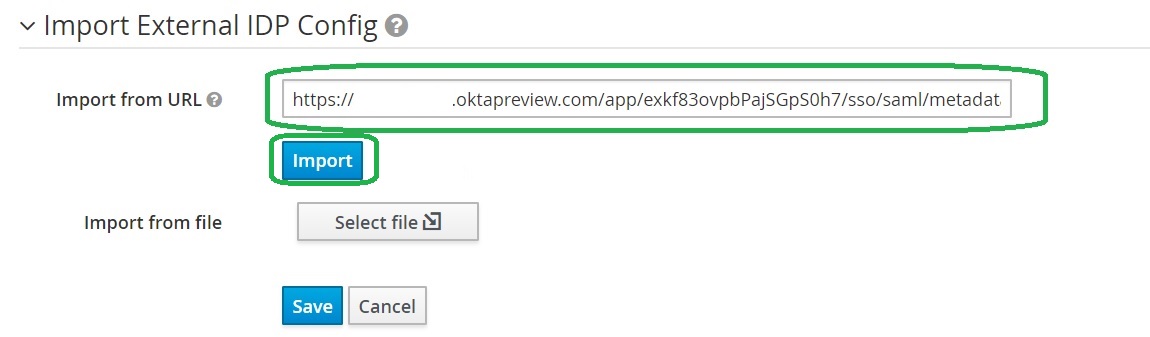
Import Okta Identity Provider Metadata into Keycloak
Open the Identity Providers configuration and paste the metadata link value into the Import from URL area and click the Import button.
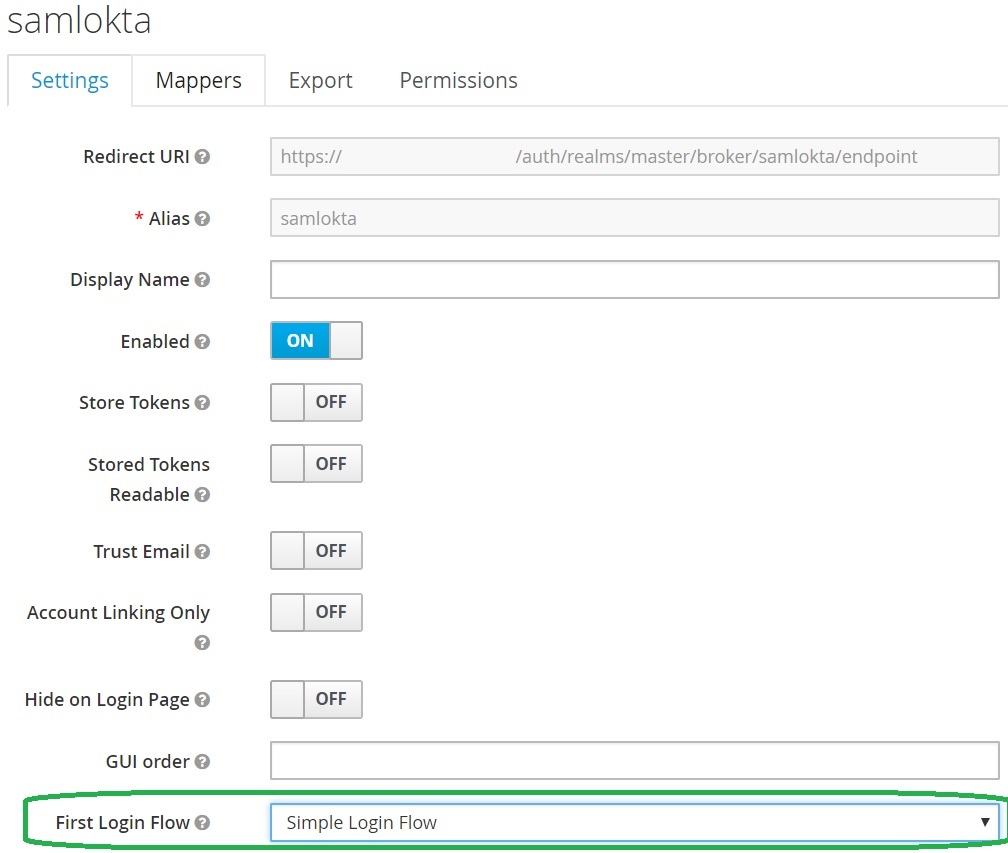
Configure First Login Flow
In my previous post I have described how to add Simple Keycloak First Login Flow
Let’s configure the flow. Select Simple Login Flow for First Login Flow field.
Finally, save the provider configuration
Login using Okta SAML
You open the login page and you will surprise! We have the additional button that allows us to login to Keycloak using the Okta SAML provider:
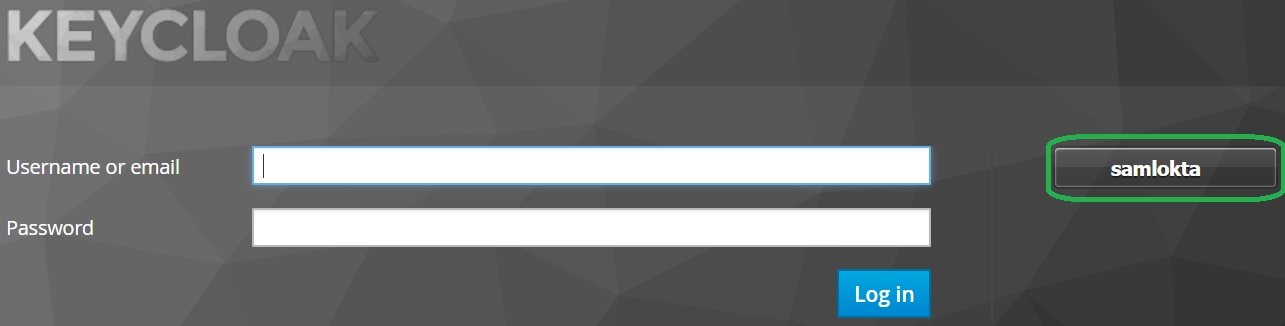
Note that you can configure Display Name in the provider configuration and to set more friendly name.
Click on the button and you will be redirected to the Okta SAML provider for the authentication.
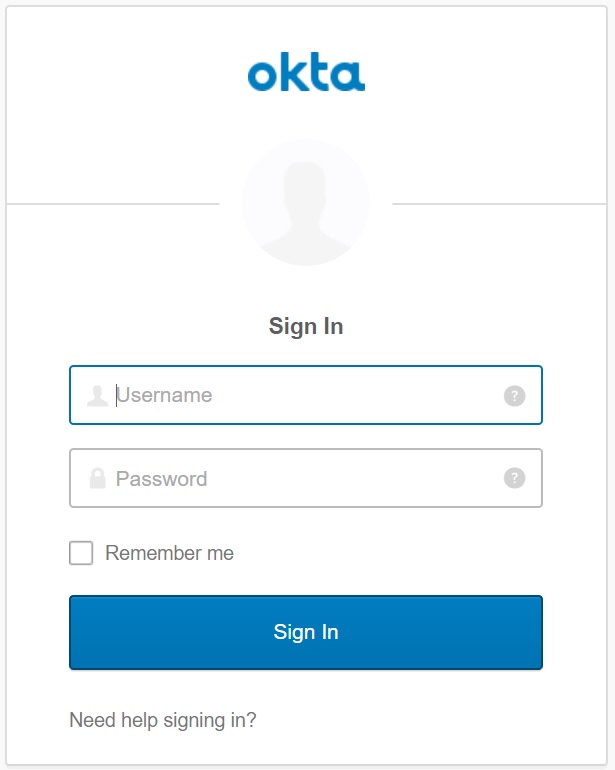
After the successful authentication you will be redirected back to Keycloak.
Note: you need to assign users to the application.
Enjoy Okta SAML integration
Take-aways
You know how to integrate Keycloak with Okta SAML Provider