What will I cover in this post?
We will learn how to integrate Keycloak with Onelogin OIDC Provider.
Similar to SAML, Keycloak can be configured to use the external OpenID Connect Provider.
The configuration steps are very similar to the configuration of SAML Provider described in my previous post, but the configuration simpler that the SAML configuration.
Do not forget to follow me on Twitter

Configuration
Keycloak and Onelogin need to be configured in parallel.
First, you need to add an OpenID Connect Identity Provider in Keycloak.
Then you to add an OpenID Connect application in Onelogin using the Keycloak Redirect URI value.
Finally, you need to configure the Onelogin application metadata in the Keycloak’s OpenID Connect Identity Provider.
Add OpenID Connect Provider in Keycloak
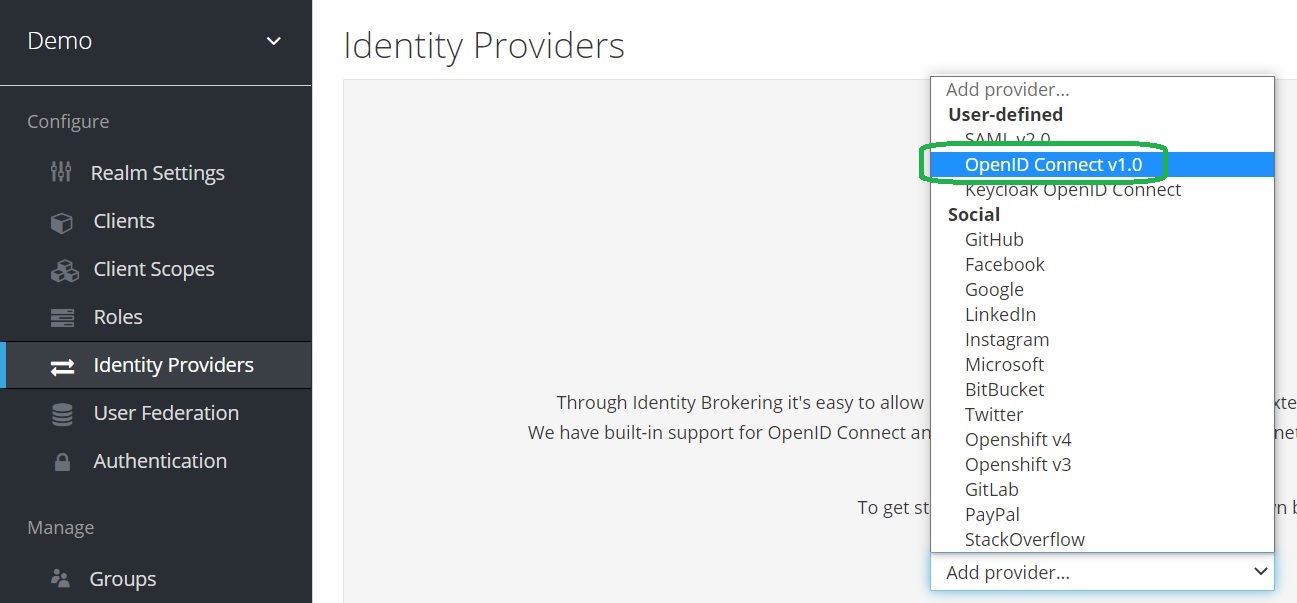
Open Keycloak admin page, open Identity Providers, select the OpenID Connect v1.0 provider from the list of providers.
Configure OpenID Connect Provider in Keycloak
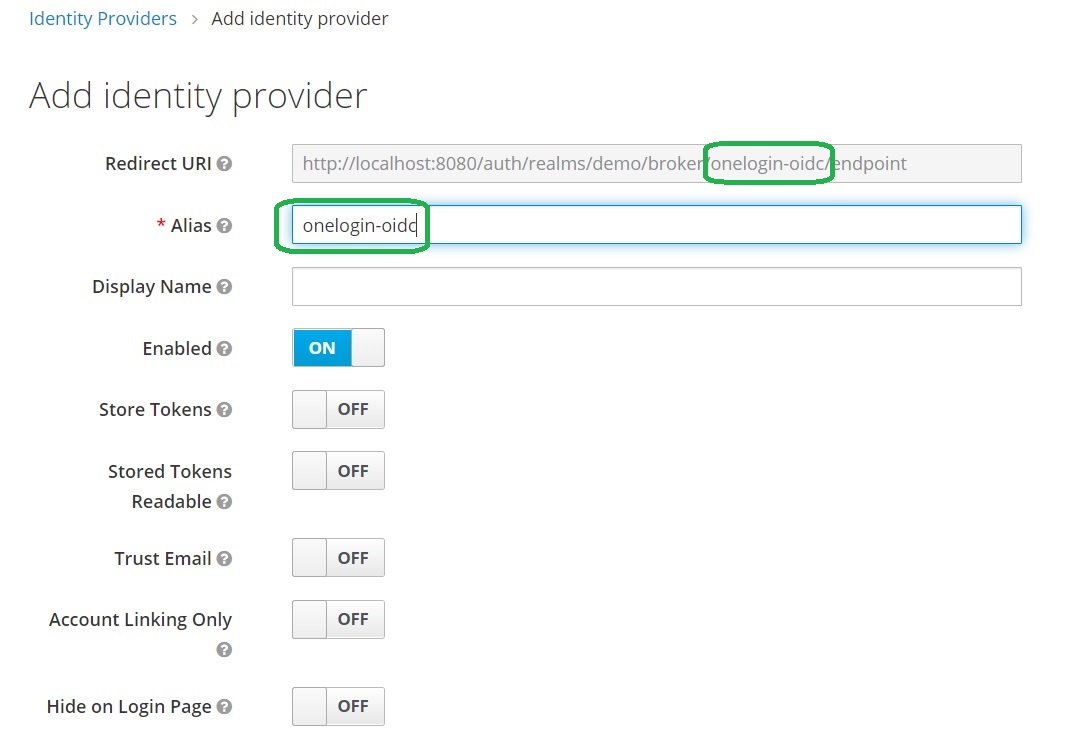
Provide the alias. Note that it is part of Redirect URI.
Add an OpenID Connect application in Onelogin
Click on the applications in the menu and then click on the Add App button.

Find the OpenID Connect application
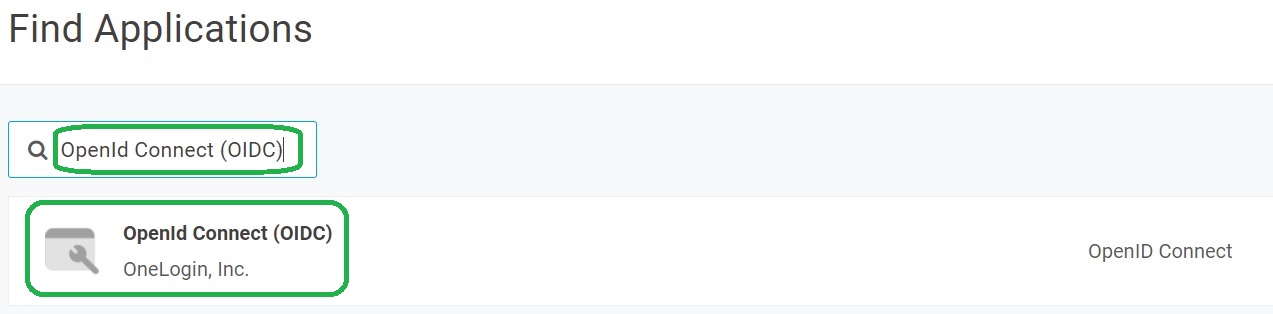
Type OpenId Connect (OIDC) in the find control. Click on OpenId Connect (OIDC).
Provide the application name
Enter OpenId Connect Demo and click Save.

Configure OpenID Connect Settings
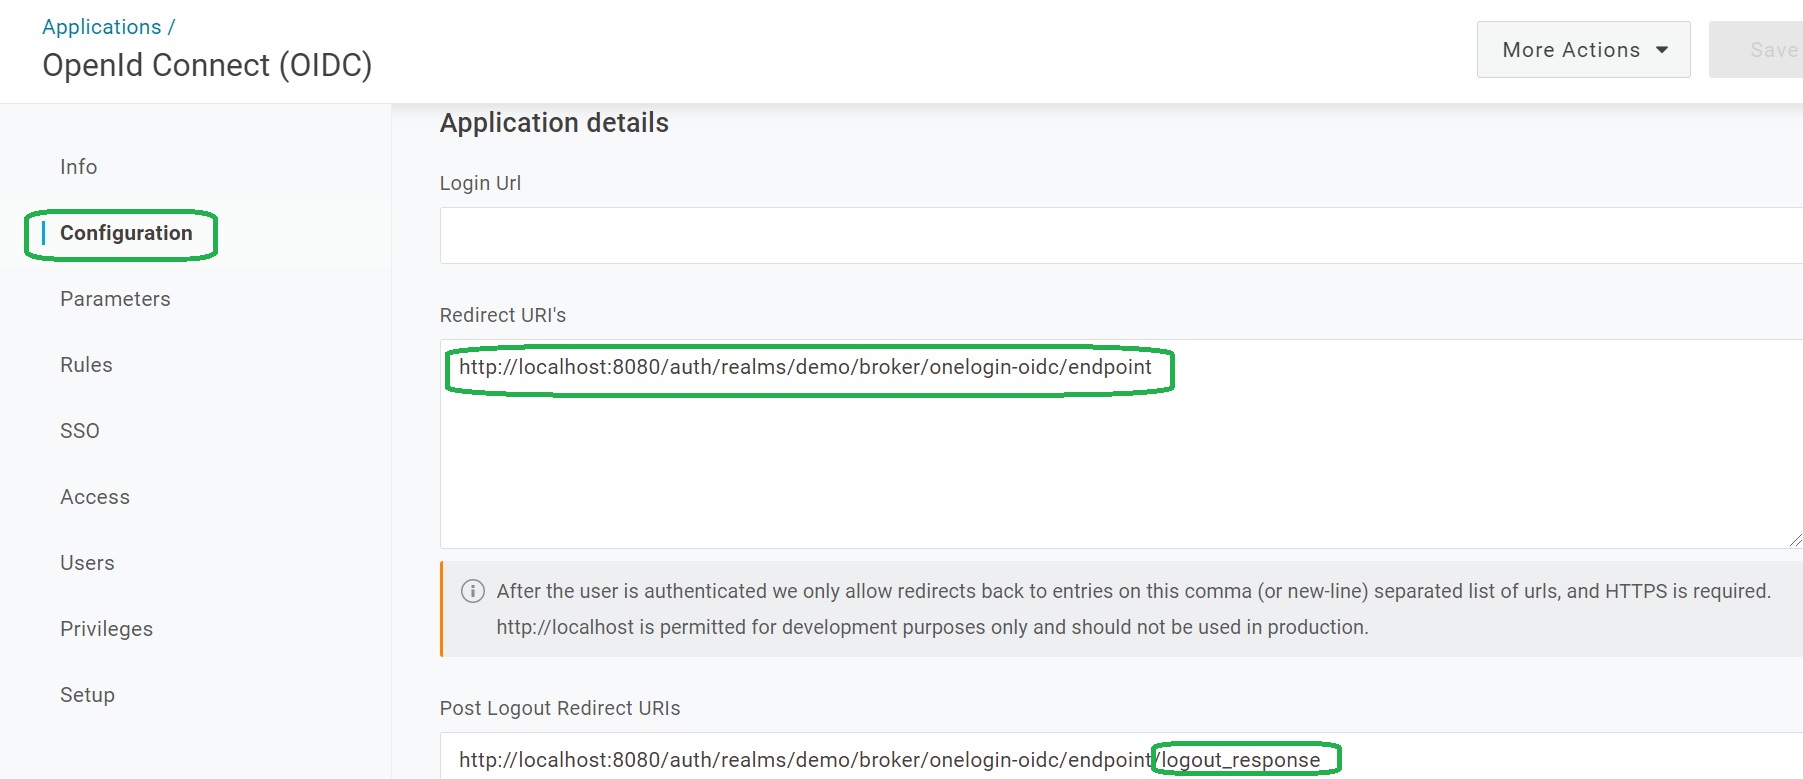
Open the Configuration tab.
Configure OpenID Connect Settings by copying the Keycloak’s Redirect URI from the SAML v2.0 provider page of Keycloak to the Redirect URI’s setting.
Copy the Redirect URI combined with the logout_response endpoint to the Post Logout Redirect URIs setting.
Click Save.
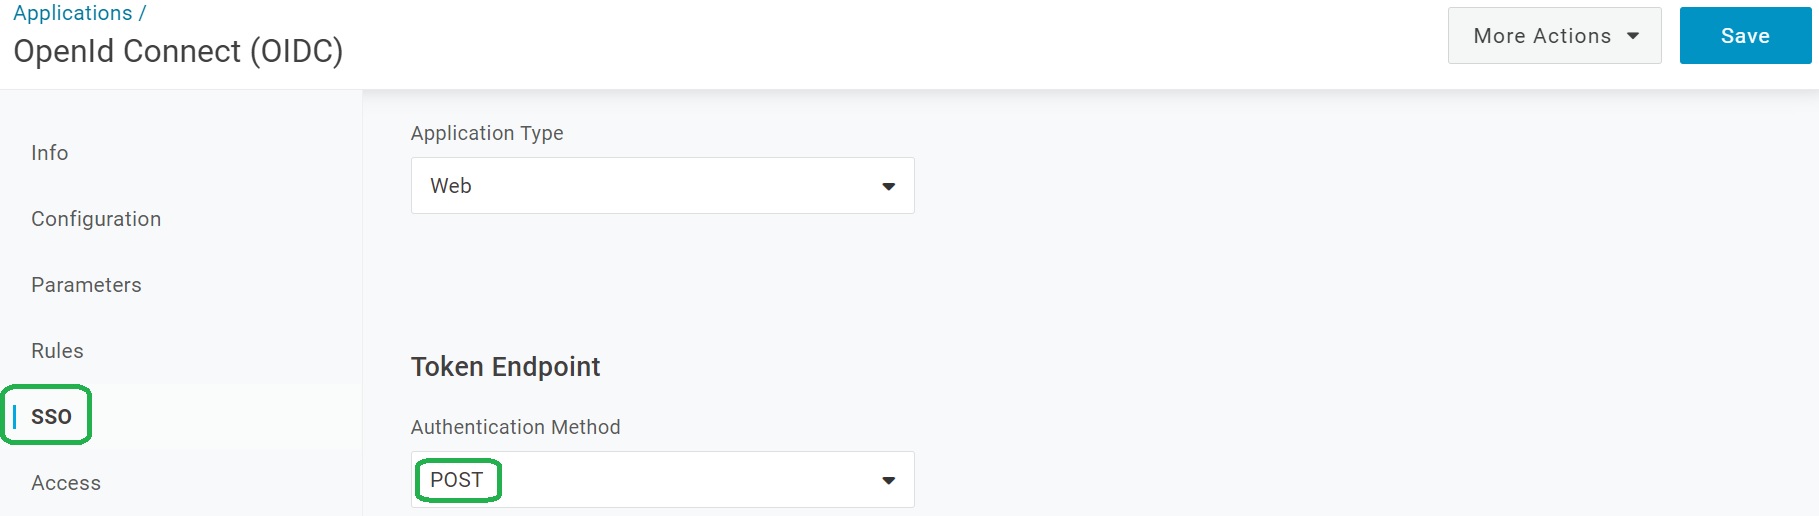
Configure SSO Settings
Open the SSO tab.
Set Token Endpoint Authentication Method to POST.
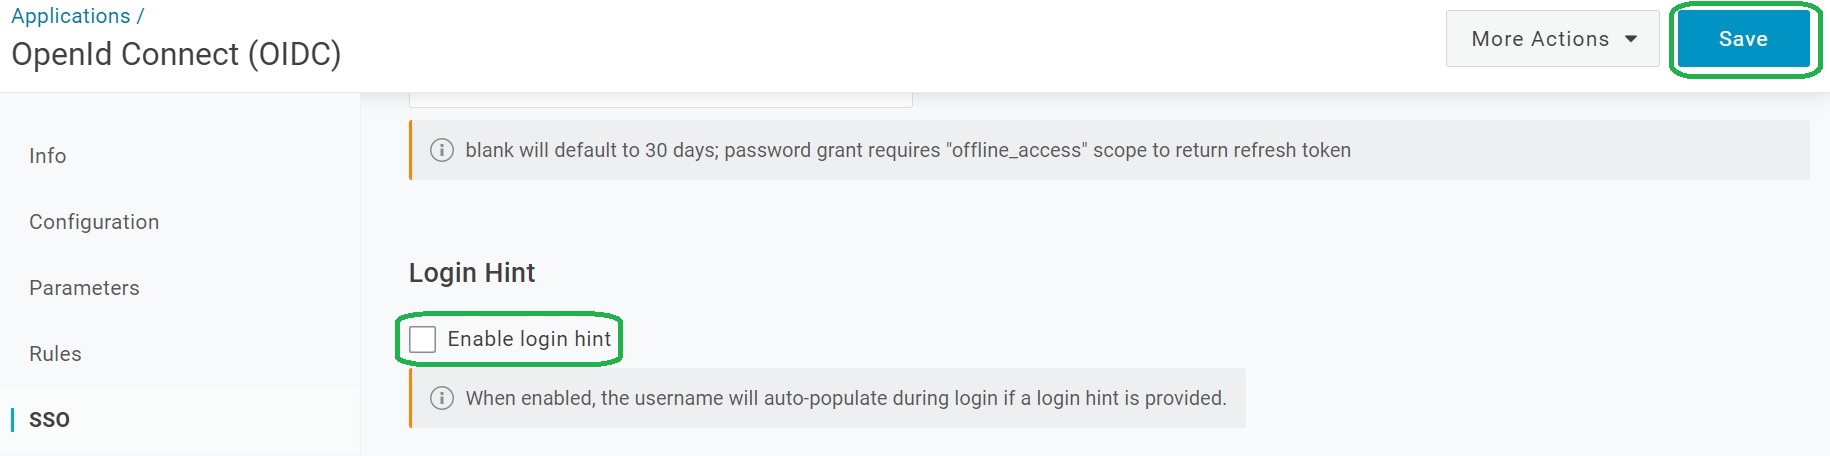
Uncheck Enable login hint and click Save.
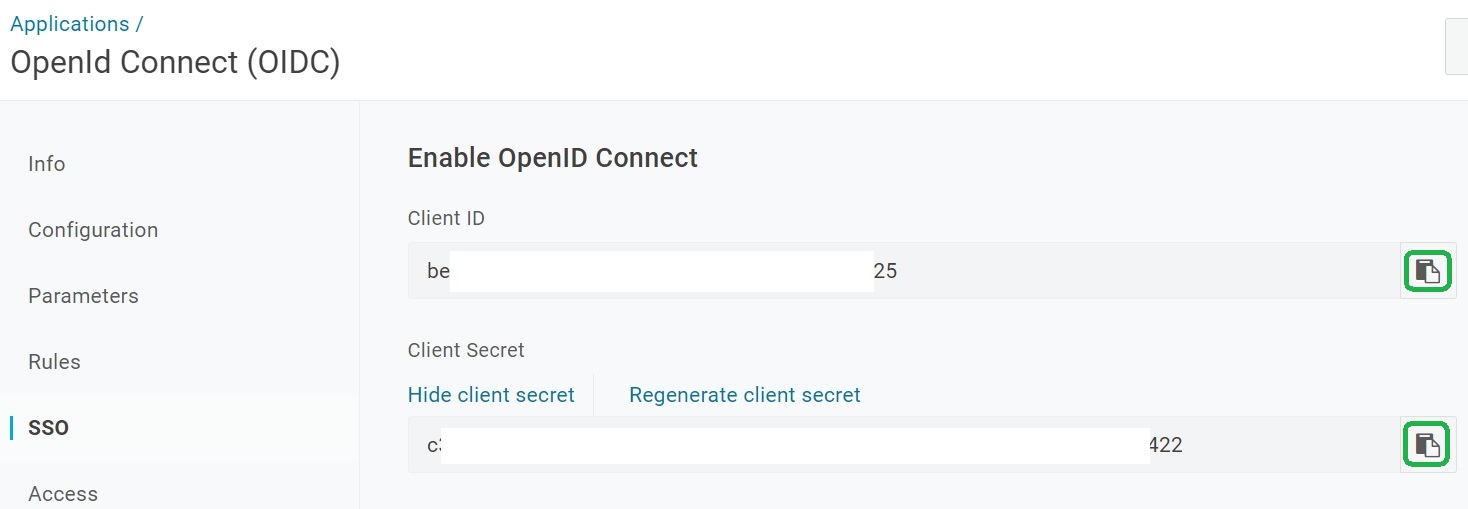
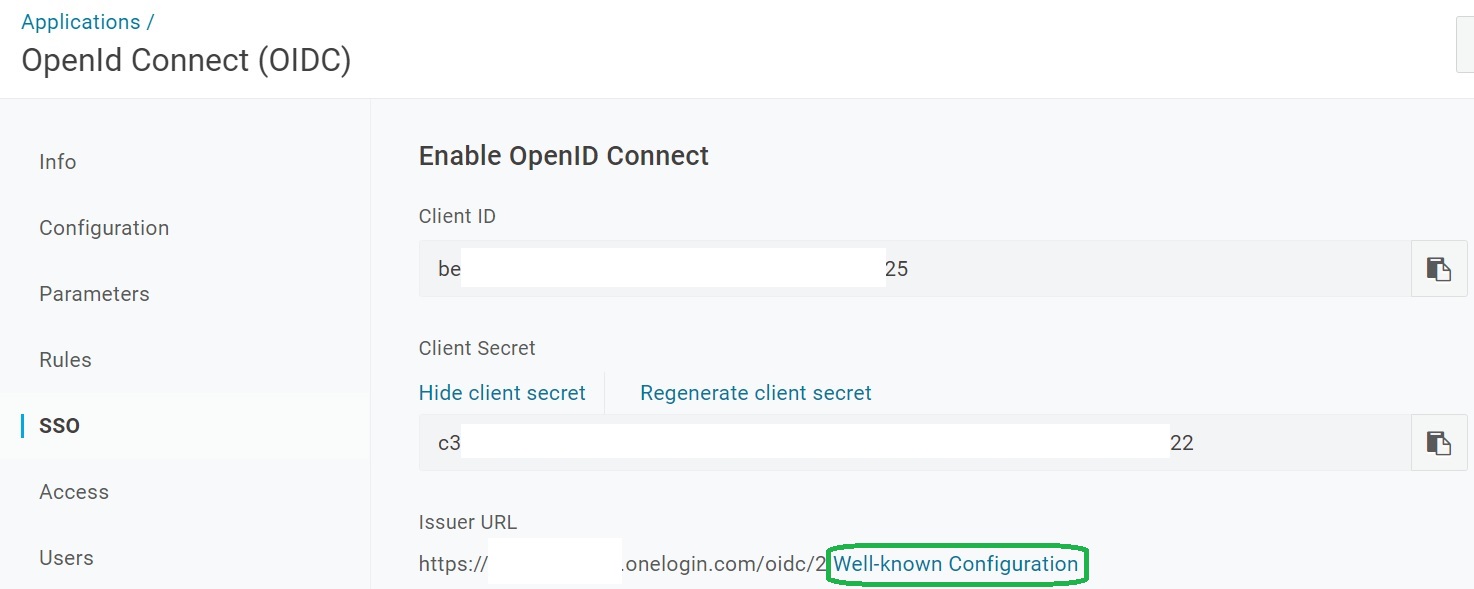
Client ID and Client Secret
Open the SSO tab.
Click on Show client secret.
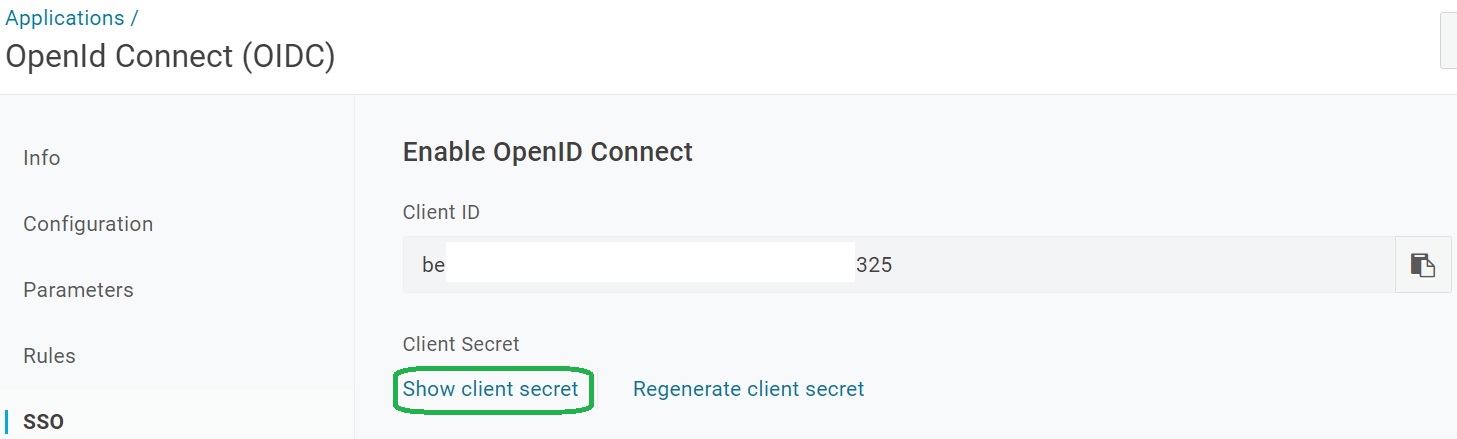
You will need to copy Client ID and Client Secret to the Keycloak provider in one of the following steps.
Copy the metadata link
Open the SSO tab.
Hover over Well-known Configuration link, right-click and select from the menu Copy link.
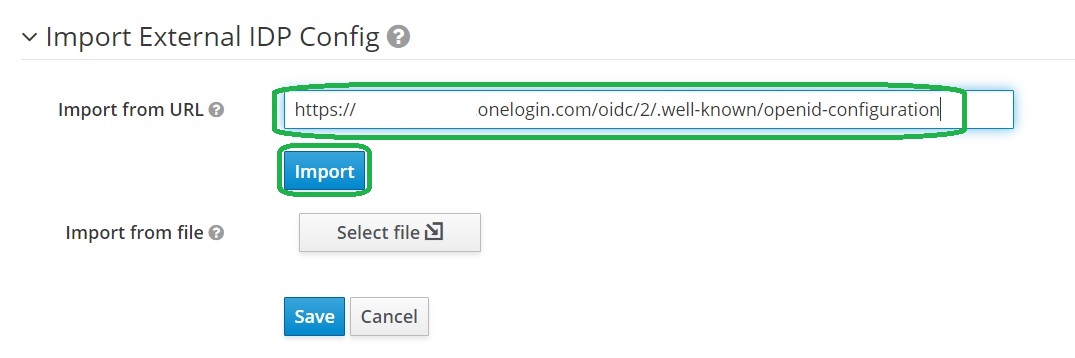
Keycloak Configuration
Import Onelogin Identity Provider Metadata into Keycloak
Scroll to the Import External IDP Config configuration and paste the metadata link value into the Import from URL area and click the Import button.
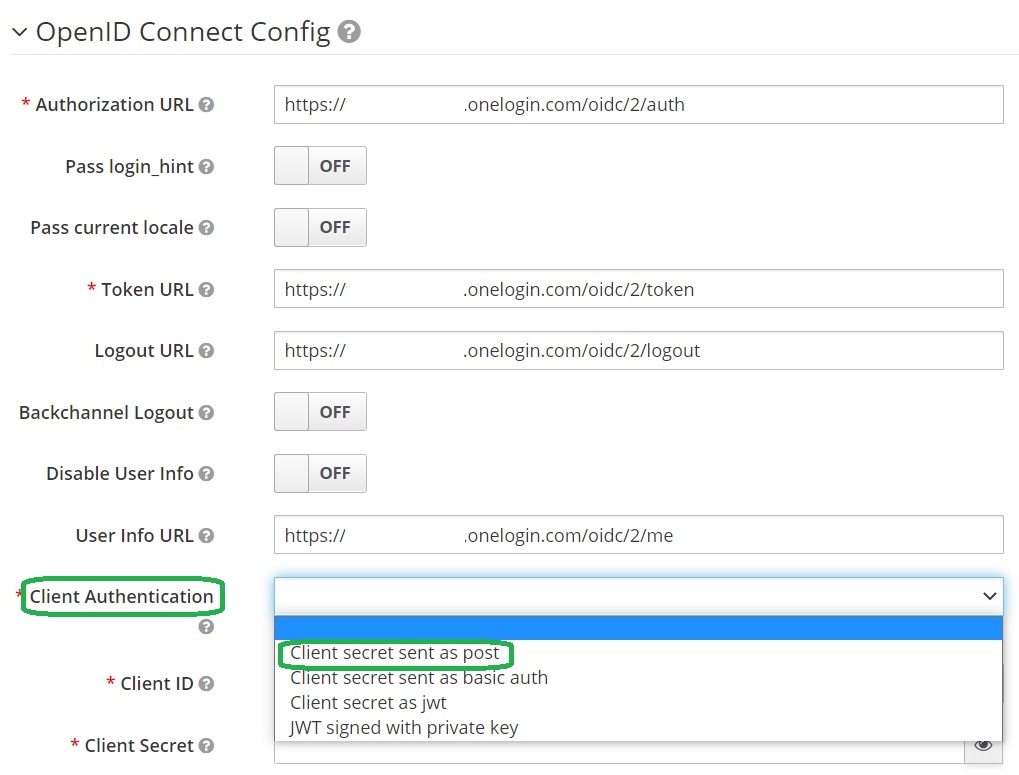
Client Authentication
Scroll to the OpenID Connect Config configuration and set Client secret sent as post in the Client Authentication setting.
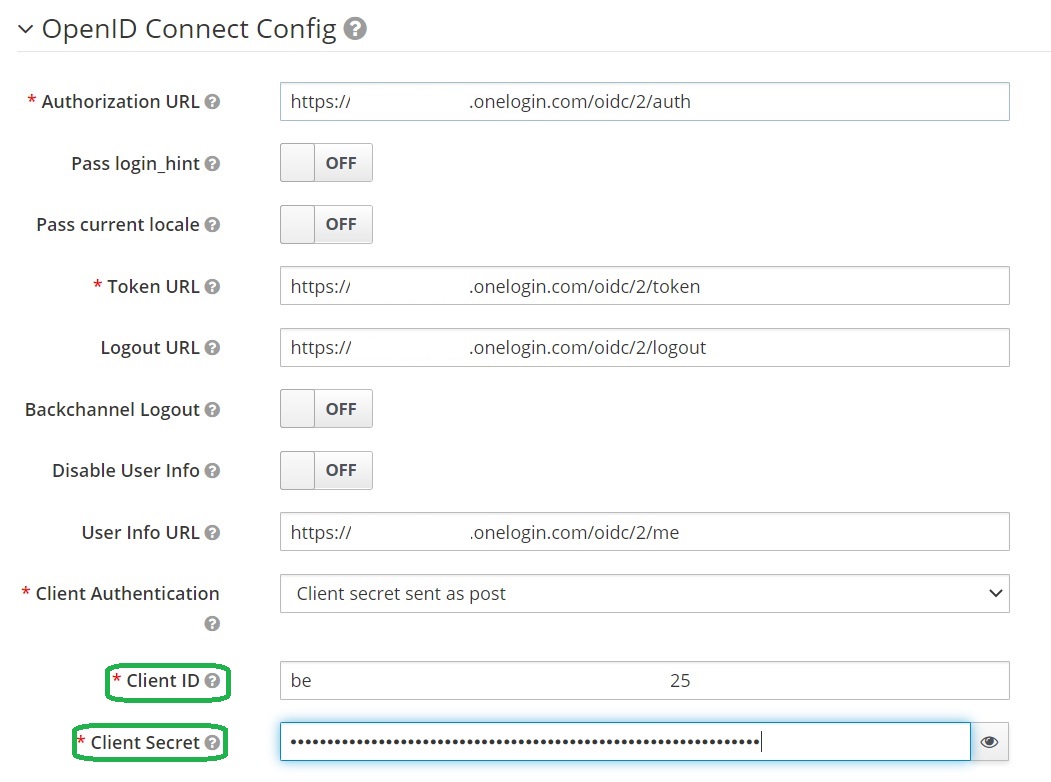
Client ID and Client Secret
Scroll to the OpenID Connect Config configuration and paste Client ID and Client Secret to the Keycloak provider:
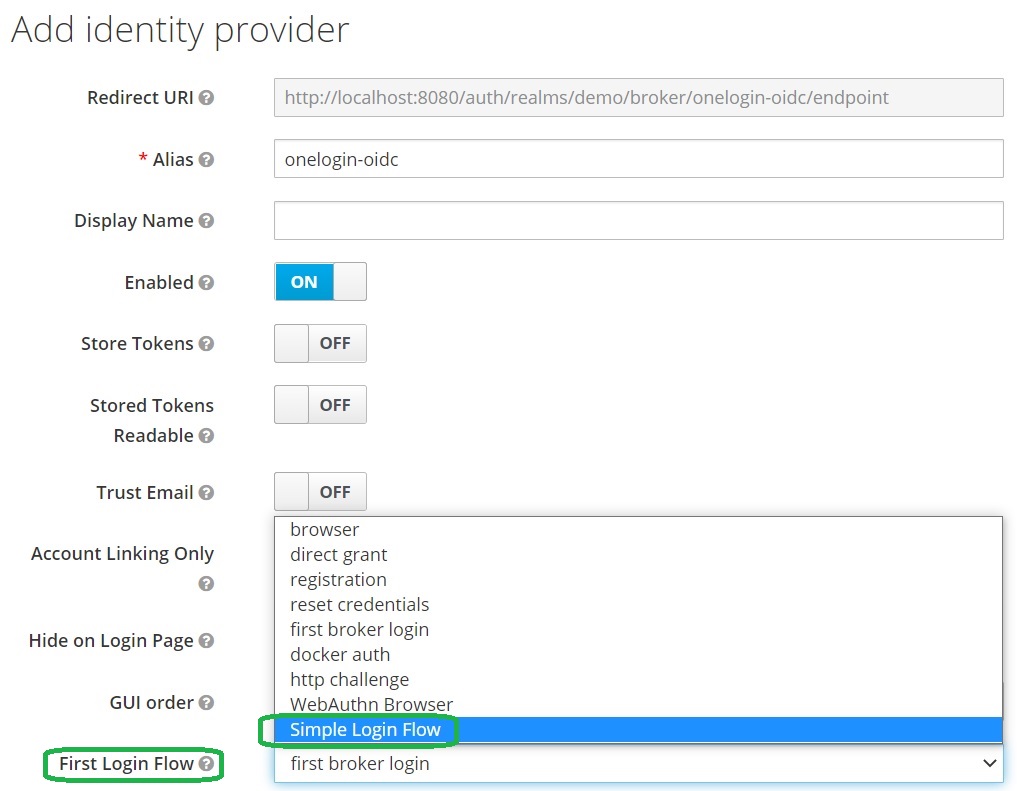
Configure First Login Flow
In my previous post I have described how to add Simple Keycloak First Login Flow
Let’s configure the flow.
Scroll to the Add identity provider configuration and select Simple Login Flow for the First Login Flow field.
Finally, save the provider configuration by click on the Save button.
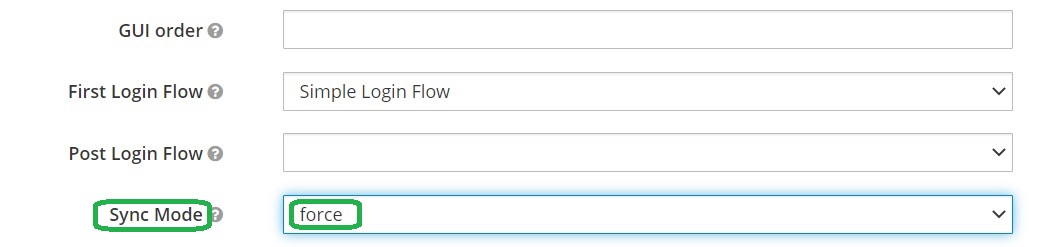
Configure Sync Mode
Configure the Sync Mode setting to the force value. It will allow to update the user attribute during every login.
Login using Onelogin OpenID Connect
You open the login page and you will surprise! We have the additional button that allows us to login to Keycloak using Onelogin OpenID Connect provider:
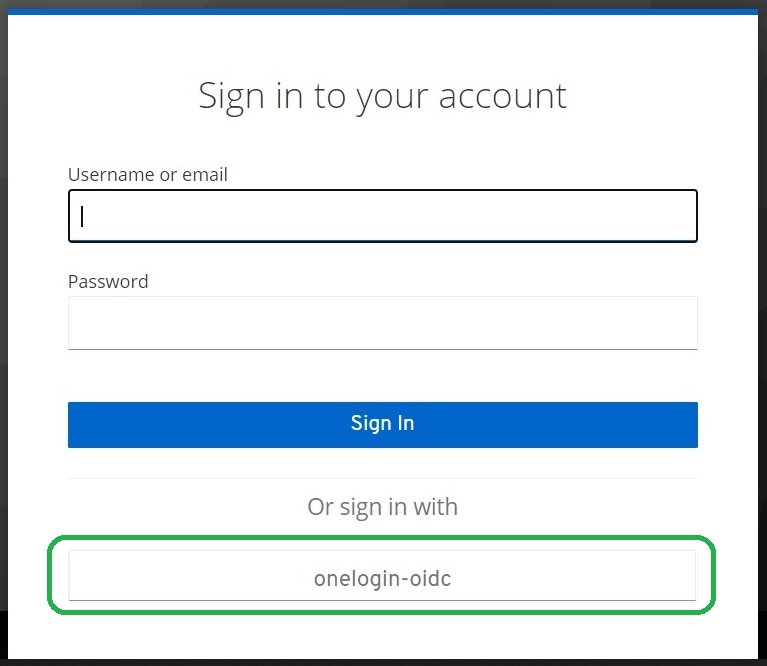
Note that you can configure Display Name in the provider configuration and to set more friendly name.
Click on the button and you will be redirected to the Onelogin for the authentication.
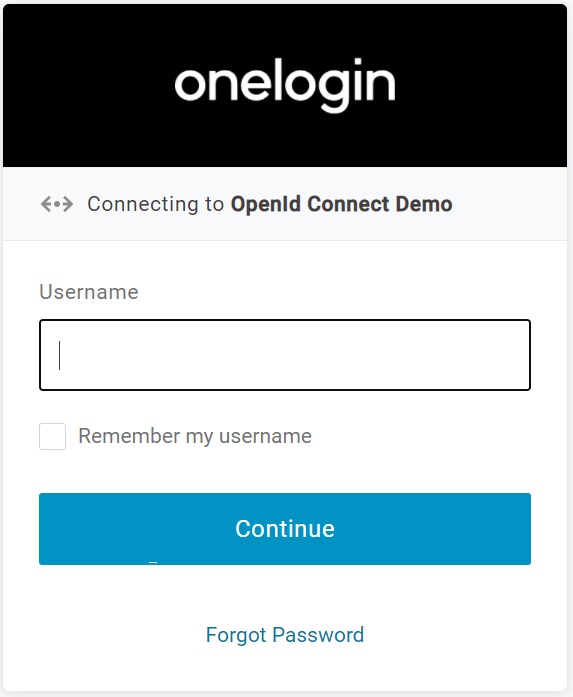
After the successful authentication you will be redirected back to Keycloak.
Enjoy Onelogin OpenID Connect integration
Take-aways
You know how to integrate Keycloak with Onelogin OIDC Provider